Apogee ensemble Betriebsanweisung
Stöbern Sie online oder laden Sie Betriebsanweisung nach Aufnahmegeräte Apogee ensemble herunter. Apogee ensemble User`s guide Benutzerhandbuch
- Seite / 42
- Inhaltsverzeichnis
- FEHLERBEHEBUNG
- LESEZEICHEN


- Multi–Channel 1
- 24bit/192kHz Audio Interface 1
- User’s Guide - OSX LION 1
- User’s Guide 3
- Owner’s Record 4
- Introduction 5
- Getting Started Quickly 6
- General Operation 10
- Maestro 2 14
- Navigating the Front Panel 30
- Connections on the Rear Panel 31
- Connecting Your Studio 32
- Apple Soundtrack Pro 34
- Apple FInal Cut Pro 34
- MOTU Digital Performer 35
- Steinberg Nuendo 35
- Troubleshooting 36
- Warnings & Copyrights 38
- Declarations of Conformity 39
- Ensemble – User’s Guide 40
Inhaltsverzeichnis
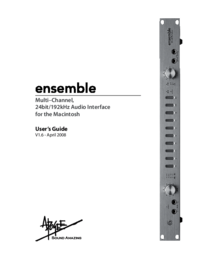
Multi–Channel, 24bit/192kHz Audio Interfacefor the MacintoshUser’s Guide - OSX LIONV2.0 - January 2012
APOGEE ELECTRONICS8Ensemble – User’s GuideMaking Settings with Software Control PanelsAll Ensemble settings are made from Apogee’s Maestro software Se
APOGEE ELECTRONICSEnsemble – User’s Guide9Setting Sample RateTo set Ensemble’s sample rate, choose the desired rate in your Core Audio compatible soft
APOGEE ELECTRONICS10Ensemble – User’s Guide18 DAW Inputs18 Hardware Inputs FireWire OutputANALOG 5ANALOG 6ANALOG 7ANALOG 8S/PDIF (L,R)OPTICALADAT 1-8,
APOGEE ELECTRONICSEnsemble – User’s Guide1118 DAW OutputsFireWire Input18 Hardware OutputsANALOG 5ANALOG 1ANALOG 2ANALOG 3ANALOG 4ANALOG 6ANALOG 7ANAL
APOGEE ELECTRONICS12Ensemble – User’s GuideMaestro 2ToolbarThe toolbar is reserved for system controls that must remain easily accessible. Clear Meter
APOGEE ELECTRONICSEnsemble – User’s Guide13Maestro 2Input Tab WindowAnalog Level - Use this menu to select the analog input format and nominal referen
APOGEE ELECTRONICS14Ensemble – User’s GuideMaestro 2Output Tab WindowAnalog Level - Use this menu to select the nominal reference level for each analo
APOGEE ELECTRONICSEnsemble – User’s Guide15Maestro 2Device Settings Tab WindowPeripheral Prex - Use this drop-down menu to assign a letter prex (A-Z
APOGEE ELECTRONICS16Ensemble – User’s GuideMaestro 2RoutingThe input and output routing control is accomplished across a combination of routing grids.
APOGEE ELECTRONICSEnsemble – User’s Guide17Maestro 2Input RoutingThe Input Routing tab window determines how Ensemble hardware inputs are routed to au
APOGEE ELECTRONICS18Ensemble – User’s GuideMaestro 2Output RoutingThe Output Routing tab window determines how audio software outputs are routed to En
APOGEE ELECTRONICSEnsemble – User’s Guide19Maestro 2Standalone RoutingHardware Output Columns - The hardware analog and digital outputs of the Ensembl
APOGEE ELECTRONICS20Ensemble – User’s GuideMaestro 2Mixer Tab WindowThis mixer provides a low latency path from Ensemble’s inputs to its outputs, for
APOGEE ELECTRONICSEnsemble – User’s Guide21Maestro 2System Setup WindowClock Source - This drop down selects the clock source for the Ensemble. The fo
APOGEE ELECTRONICS22Ensemble – User’s GuideMaestro 2Menu Bar MenusAbout Apogee Maestro - Choose this menu item to display version information.Preferen
APOGEE ELECTRONICSEnsemble – User’s Guide23Maestro 2Maestro Low Latency mixingWhile recording, if you notice a delay between the moment you play or si
APOGEE ELECTRONICS24Ensemble – User’s GuideMaestro 2Working with the Maestro MixerDo I need the Maestro Mixer?The Maestro mixer serves to provide a lo
APOGEE ELECTRONICSEnsemble – User’s Guide25Maestro 2Software monitoringBecause the signal to be recorded is monitored through the Maestro mixer, the o
APOGEE ELECTRONICS26Ensemble – User’s GuideMaestro 2Step by Step instructions to record with the low latency mixerSet the software application’s mixer
APOGEE ELECTRONICSEnsemble – User’s Guide27Maestro 2Step by Step instructions to record with the low latency mixerIn the Mixer tab window, set the Sof
User’s GuideContentsOwner’s Record 2Introduction 3Getting Started Quickly 41. Installing software 42. Hardware connections 4Getting Started Quick
Navigating the Front Panel1. Power Switch – Press this button to apply power to Ensemble. When Ensemble’s AC input is connect-ed, the switch will li
1. MIC1–4 – These XLR connectors accept balanced mic or line inputs; input level is determined in software control.2. INSERT SEND – RETURN (channe
APOGEE ELECTRONICS30Ensemble – User’s GuideConnecting Your Studio2 Instruments 2 HeadphonesDVD/CDPowered MonitorsSynthesizerMicrophonesBasic studio co
APOGEE ELECTRONICSEnsemble – User’s Guide31Connecting Your Studio5.1 surround conguration:5.1 Surround Speaker Set–up
APOGEE ELECTRONICS32Ensemble – User’s GuideConguring Audio Software AppsApple Soundtrack ProTo select Ensemble as hardware I/O:1. Playback – open th
APOGEE ELECTRONICSEnsemble – User’s Guide33Conguring Audio Software Appsgure 28gure 29gure 30MOTU Digital PerformerTo select Ensemble as hardware
APOGEE ELECTRONICS34Ensemble – User’s GuideTroubleshootingThe power switch’s blue LED is lit, but no other LEDs are on; is the unit in operation?– Not
APOGEE ELECTRONICSEnsemble – User’s Guide35TroubleshootingI want to run Ensemble at 176.4 –192 kHz, but I only see 44.1–96 kHz in AMS.– Ensemble can o
APOGEE ELECTRONICS36Ensemble – User’s GuideWarnings & CopyrightsFCC warningThis equipment has been tested and found to comply with the limits for
APOGEE ELECTRONICSEnsemble – User’s Guide37Declaration of Conformity—FCCApogee EnsembleThis device complies with Part 15 of the FCC Rules. Operation i
APOGEE ELECTRONICS2Ensemble – User’s GuideThe serial number is located on the rear panel of the unit. We suggest you record the serial number in the s
APOGEE ELECTRONICS38Ensemble – User’s GuideBe sure to register your Ensemble, either by lling in the enclosed Registration Card or by completing the
User’s Guide - OSX LIONV2.0 - January 2012
APOGEE ELECTRONICSEnsemble – User’s Guide3IntroductionEnsemble is a digitally–controlled Firewire audio interface specically designed for Apple Macin
APOGEE ELECTRONICS4Ensemble – User’s GuideGetting Started QuicklyInstalling software Insert the included CD in your Mac’s optical drive slot, double
APOGEE ELECTRONICSEnsemble – User’s Guide5OS X conguration From your Mac’s Apple menu bar, open the System Preferences window, then click on the sou
APOGEE ELECTRONICS6Ensemble – User’s GuideGetting Started QuicklyDAW conguration Congure your Core Audio compatible software to communicate with En
APOGEE ELECTRONICSEnsemble – User’s Guide7Recording Connect a mic to the MIC 1 rear panel connnec-tion (gure 13). or an instrument to the HI–Z
Weitere Dokumente für Aufnahmegeräte Apogee ensemble



Verwandte Produkte und Handbücher für Aufnahmegeräte Apogee ensemble
 (59 Seiten)
(17 Seiten)
(24 Seiten)
(32 Seiten)
(59 Seiten)
(17 Seiten)
(24 Seiten)
(32 Seiten)
© 2020, manymanuals.de. Alle Rechte vorbehalten. | 0.024 s |
 Manymanuals.com
 Manymanuals.de
 Manymanuals.fr
 Manymanuals.it
 Manymanuals.pl
 Manymanuals.cz
 Manymanuals.es
 Manymanuals-pt.com
Kommentare zu diesen Handbüchern